Set up your workspace and identify the parts
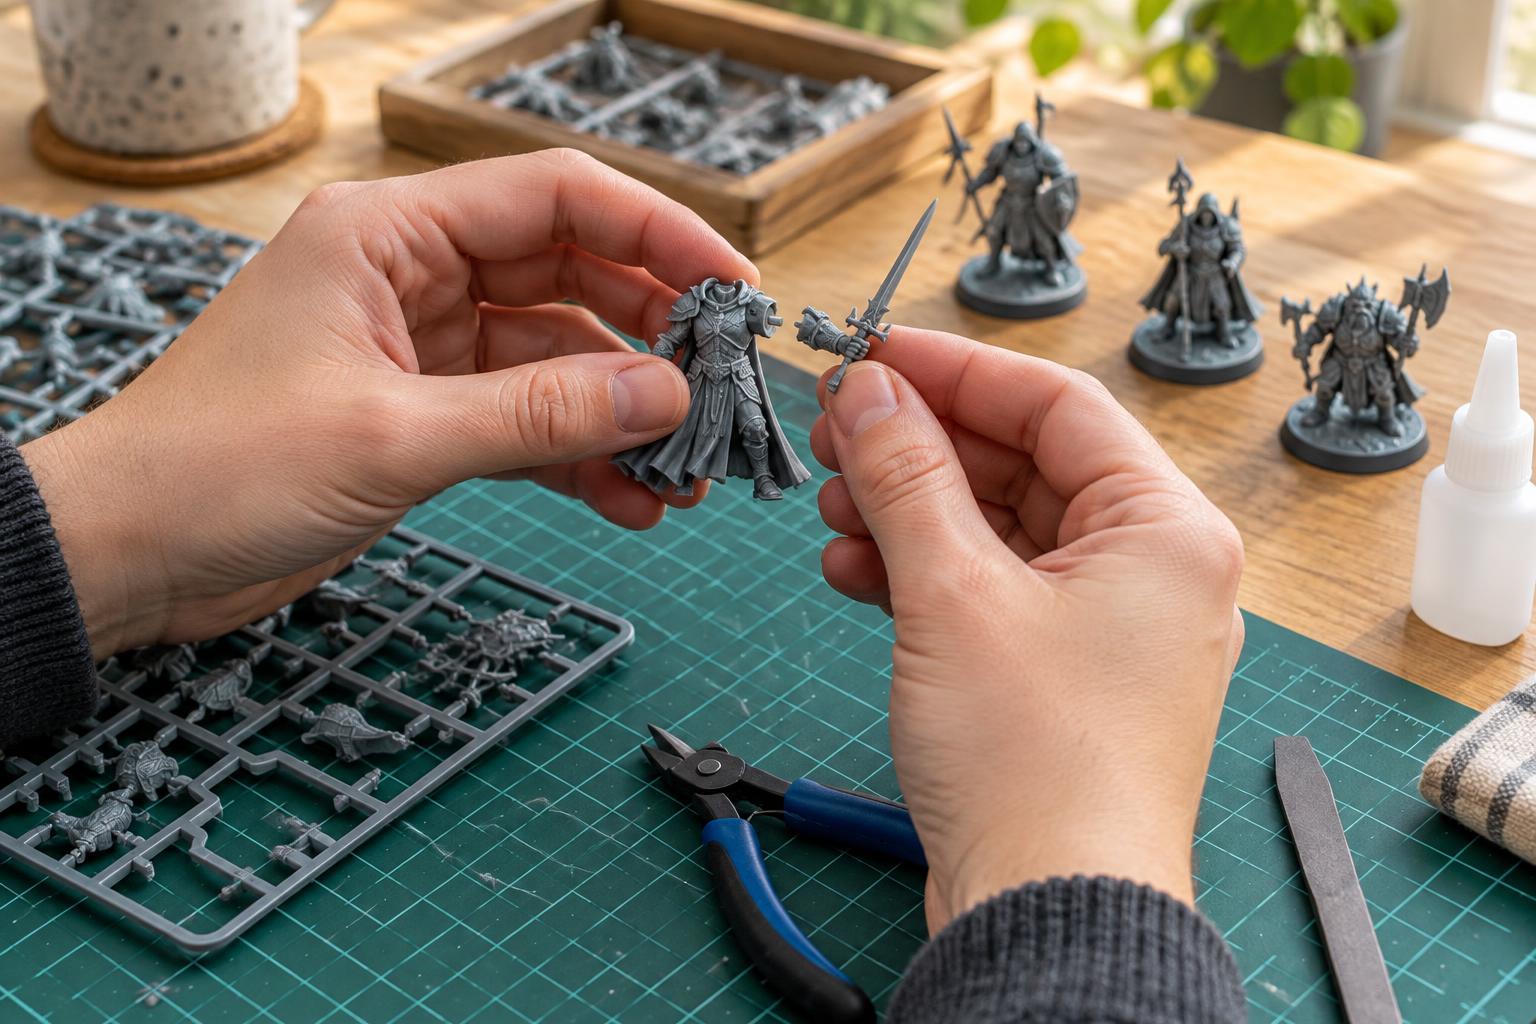
Building a plastic miniature is easier when the small parts have somewhere safe to land. Work on a clear, well-lit table with a cutting mat or other protective surface. Keep a small container nearby for loose pieces, and leave enough room to set an assembled model aside while its joints cure. A pair of flush cutters, a hobby knife, a fine sanding stick, and a small amount of suitable glue will cover most basic kits.
Before cutting, look over the instructions and find each part on its frame, often called a sprue. Notice where the attachment points meet the model and which surfaces will eventually be glued together. Some kits offer alternate heads, weapons, or poses; choosing those before removing parts can save you from sorting through nearly identical pieces later. If a part is tiny, remove and prepare it only when you are ready to use it.
Remove parts without stressing them
Use cutters to snip the sprue a short distance away from the part rather than trying to make a perfectly flush cut in one move. This leaves a small nub that you can trim more carefully afterward. Support delicate pieces with your free hand so they do not twist as the cutters close. For long items such as staffs or thin blades, release the surrounding sprue in stages instead of pulling the piece free.
Once the part is loose, trim the remaining nub with cutters or shave it down in small passes with a hobby knife. Cut away from your fingers and keep the blade under control; forcing a dull blade is especially likely to spoil a small detail. If you are not comfortable using a knife, a fine sanding stick can remove many nubs more slowly. Avoid tearing parts from the frame, since that can leave a pit or a stress mark in visible plastic.
Clean mold lines and check seams
A mold line is a faint raised ridge left where the two halves of a mold met. Turn each part under the light to spot lines along arms, clothing, equipment, and bases. Gently scrape along the ridge with the back of a hobby-knife blade or use a fine sanding stick. Take a little material off at a time, especially near faces or textured areas. Wipe away plastic dust before checking your progress.
A seam is the join between two assembled pieces. Before adding glue, hold matching parts together and look for gaps or areas that prevent a close fit. A leftover sprue nub may be the only problem. Removing it now is simpler than trying to repair a joint after it has set. Some seams are part of the model's design and need no work; others can be made less noticeable by aligning the edges carefully during assembly. Clean and test the parts before deciding whether a gap needs filling.
Dry-fit before committing to glue
A dry fit means putting parts in position without adhesive. It shows how tabs and sockets align, whether an arm blocks access to a chest detail, and how the miniature will sit on its base. Test nearby pieces together, not just one joint at a time. On a complicated model, it may help to assemble the torso first and leave accessories separate until you understand the pose.
Think ahead to painting, too. A shield placed close to a body might make the area behind it difficult to reach with a brush. You can leave such a piece unattached for painting if its connection point will remain accessible afterward. Keep separated parts together and note where they belong. There is no need to complicate a straightforward kit, but a minute of dry-fitting can prevent an awkward angle or a misplaced piece.
Choose glue carefully and let joints cure
Check the kit material and the adhesive label before gluing. Plastic cement is commonly used for compatible polystyrene kits because it softens the mating surfaces and bonds them as they set. It may not work on other materials, including some resin or preassembled plastic parts. Cyanoacrylate glue, often called super glue, is an option for many mixed-material joints. If you are unsure what a kit is made from, test the adhesive on a hidden offcut rather than a prominent part.
Use only a small amount of glue on the contact surfaces. Apply it as directed on the label, bring the pieces together, and hold them in alignment without squeezing hard enough to bend them. Work in a ventilated area, avoid skin and eye contact, and keep adhesives away from children and pets. Cap the container when it is not in use. Follow the product's stated drying and curing guidance before handling the model heavily: a joint that feels steady at first may still need time to reach full strength.
Finish by checking that the miniature stands securely and that no loose pieces remain on the table. Small imperfections can often be tidied once a joint has cured, so there is little benefit in rushing the final steps. Careful cuts, light cleanup, and patient gluing make the next model easier as well as the current one sturdier.